Circuit hacking: AI assisted clock control

As a weekend project, I thought I would try to do something with an old Raspberry Pi 3 I had lying around. However, I have not actually done non-trivial breadboarding since high school, and I wasn’t sure where to start. Luckily I recently got invited to the OpenAI Codex Beta, so I was able to generate a lot of the code automatically!
First, I bought a 7 segment display for £2.20. The SKU for the component is MMP-0205, and printed on the device is 57-0193. Unfortunately, I couldn’t find any guides for how to control this display for a Raspberry Pi 3. However, I found this guide for an Arduino. Perhaps I could get it to work somehow?
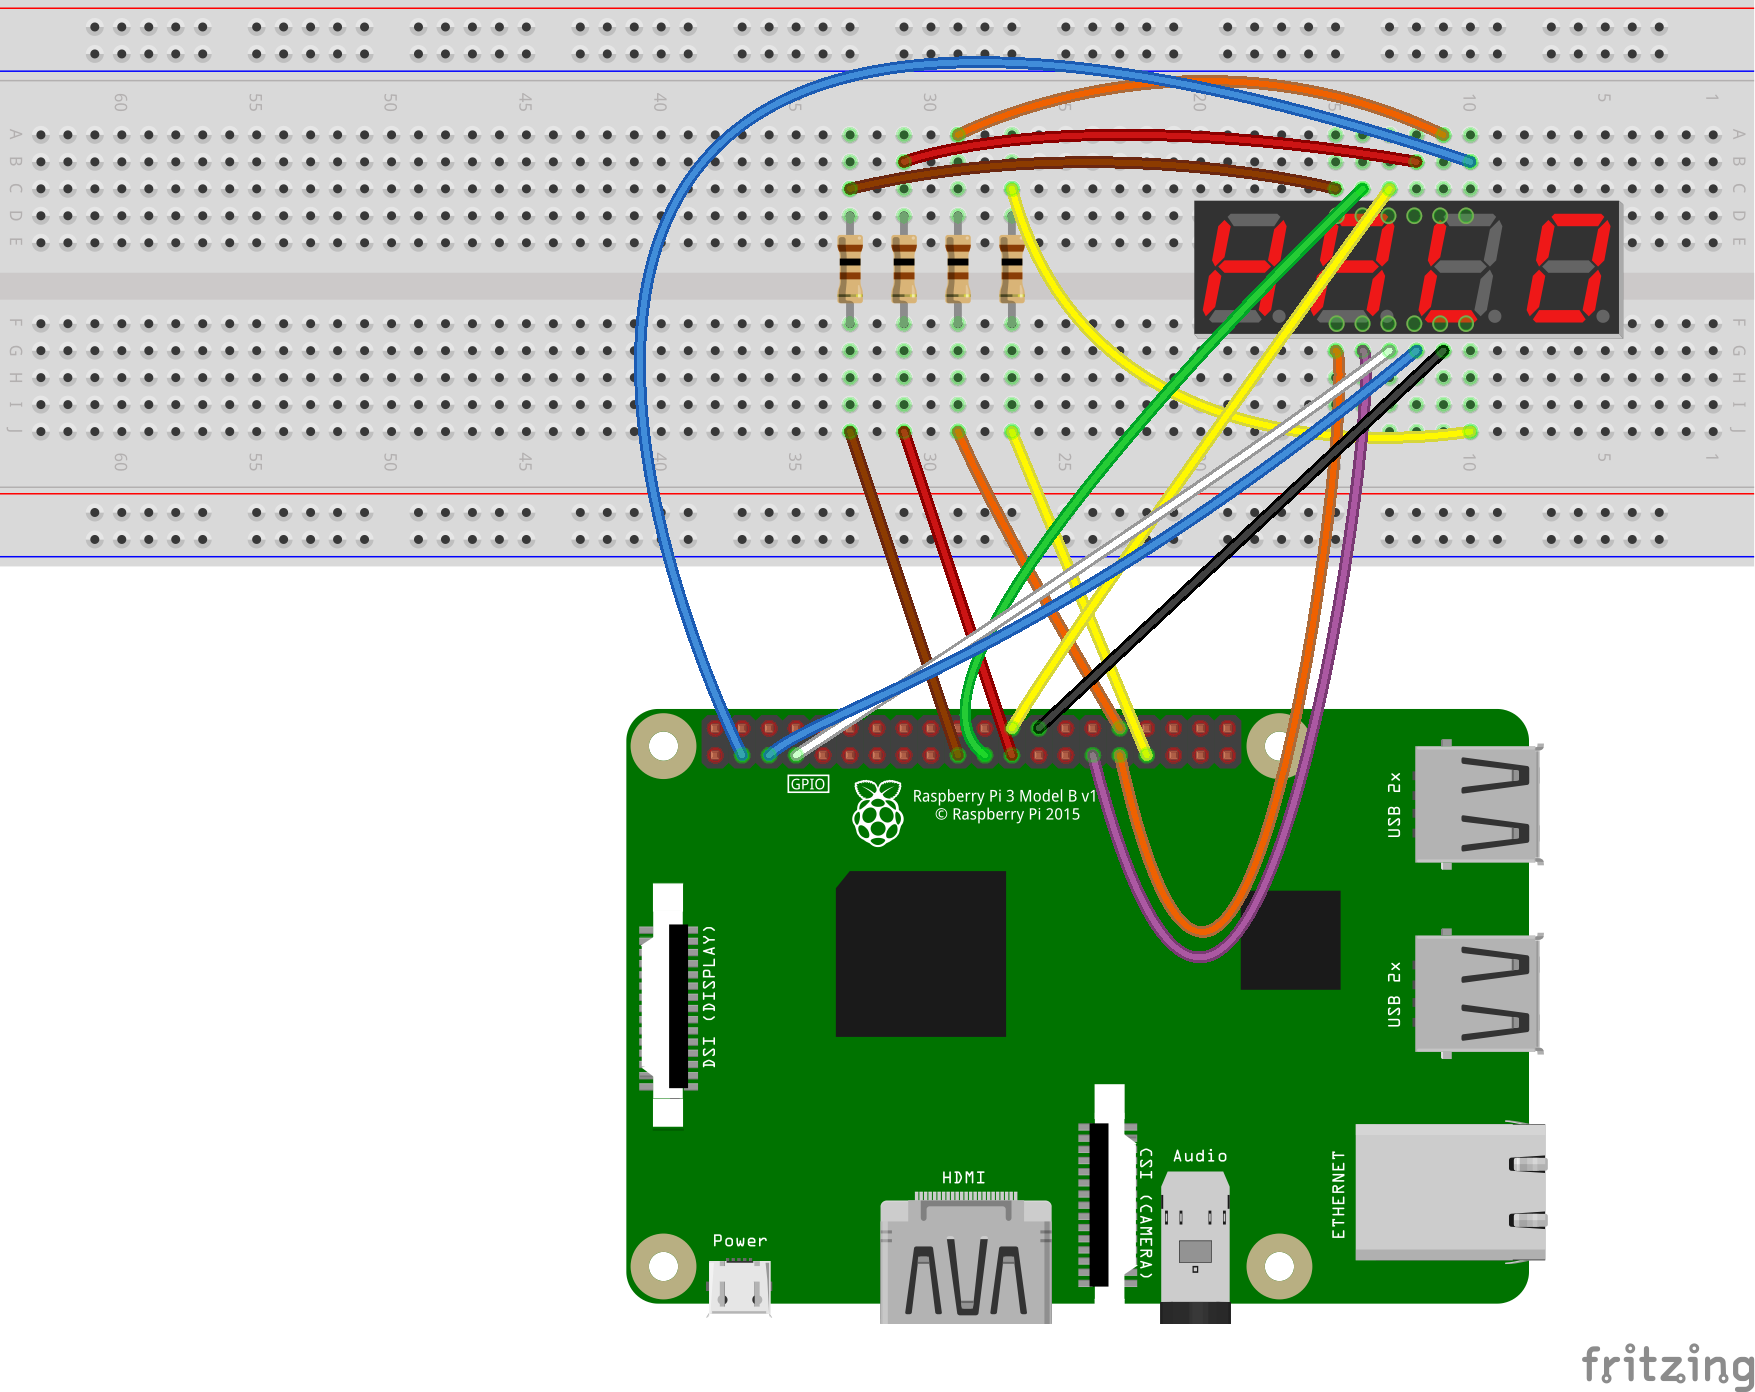
I wired up my Raspberry Pi 3 in the same way as described in the Arduino blog post, using 100Ω resistors. The pin layouts are different, however I looked up the GPIO pins of the RPi3, and made sure that I used the same GPIO pin numbers.
There are a lot of wires involved, so I used the open source tool “Fritzing” to keep track of my wiring (including wire colours - very helpful). You can see what I worked out below (pretty messy, but it does the job). You can download the Fritzing file I made here, if you want to adjust it for the wire colours you’re using.
Then I hit my first snag: the code in the Arduino blogpost is for Arduino’s C-like language. I didn’t want to spend the time working out how (or if) I could run that on the Raspberry Pi 3. So instead, I asked an AI to do it for me! For those of you not in the know, OpenAI Codex is a variant of OpenAI’s GPT-3 family of language models which can generate and edit source code. Some friends and I have been experimenting with it, and it has already saved me time in my actual work by implementing a lot of boilerplate and parsing code which was necessary but not core to my research.
For this project, I wanted to work in Python, which is great for hacking around. Therefore, I gave the code-davinci-002 model the following prompt, with the language set to Python, and the digit and segment pins copied from the Arduino blog post:
# A RPi3 GPIO control for a clock
# a 4-digit 7 Segment display, with a common cathode configuration
# The digit pins are 10, 11, 12, 13
# The segment pins are 9, 2, 3, 5, 6, 8, 7, 4
# Display the current time in 24h format
Pressing generate, Codex gave the following code:
import RPi.GPIO as GPIO
import time

GPIO.setmode(GPIO.BCM)

# initialise the setup
segments = (9, 2, 3, 5, 6, 8, 7, 4)

for segment in segments:
    GPIO.setup(segment, GPIO.OUT)
    GPIO.output(segment, 0)

digits = (10, 11, 12, 13)

for digit in digits:
    GPIO.setup(digit, GPIO.OUT)
    GPIO.output(digit, 1)

num = {
    " ": (0, 0, 0, 0, 0, 0, 0),
    "0": (1, 1, 1, 1, 1, 1, 0),
    "1": (0, 1, 1, 0, 0, 0, 0),
    "2": (1, 1, 0, 1, 1, 0, 1),
    "3": (1, 1, 1, 1, 0, 0, 1),
    "4": (0, 1, 1, 0, 0, 1, 1),
    "5": (1, 0, 1, 1, 0, 1, 1),
    "6": (1, 0, 1, 1, 1, 1, 1),
    "7": (1, 1, 1, 0, 0, 0, 0),
    "8": (1, 1, 1, 1, 1, 1, 1),
    "9": (1, 1, 1, 1, 0, 1, 1),
}

try:
    while True:
        n = time.ctime()[11:13] + time.ctime()[14:16]
        s = str(n).rjust(4)
        for digit in range(4):
            for loop in range(0, 7):
                GPIO.output(segments[loop], num[s[digit]][loop])
            GPIO.output(digits[digit], 0)
            time.sleep(0.001)
            GPIO.output(digits[digit], 1)
finally:
    GPIO.cleanup()
Hey, this code looks pretty convincing, and would have taken ages for me to write myself! I ran it, with a little bit of fear that this “seat of my pants” approach to circuit testing would blow the LEDs on my display. My first run, at 16:14, showed the following output:
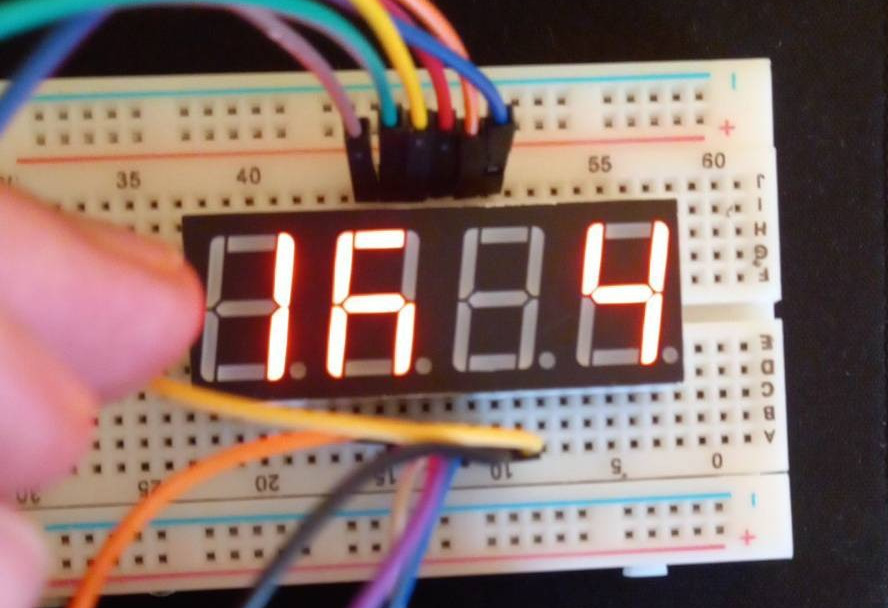
I can see the 1, a bit of the 6, and the 4. Observe that the 3rd digit is not lit, and the bottom segment of the 2nd digit is not lit (it should be, since it is a 6). However, this is promising, and I waited a short time and saw that the display did change! There must be a bug in my wiring somewhere!
However, how do I debug it, since I don’t have a lot of experience with circuitry? The first bug was easy: a whole digit was not lit up, the third one. Starting with the assumption that pin 12 was the third digit (since it was the third one in the digits list), I traced my circuit, and saw that the resistor was in the wrong slot. Moving the wire, the third digit lit up.
Now, for the segment, which was a bit trickier. How do I know which segment index corresponds to which segment? I asked Codex to generate a script which would turn on each segment in turn, and print the pin number. I requested this within the already generated code, removed the clock code, and placed the request after the initial setup it had already generated.
# for each segment of the 4th digit, turn it on for 5 seconds, then turn it off again
# print the pin number of the segment
digit = 3
for segment in segments:
    GPIO.output(segment, 1)
    print(segment)
    GPIO.output(digits[digit], 0)
    time.sleep(5)
    GPIO.output(digits[digit], 1)
    GPIO.output(segment, 0)
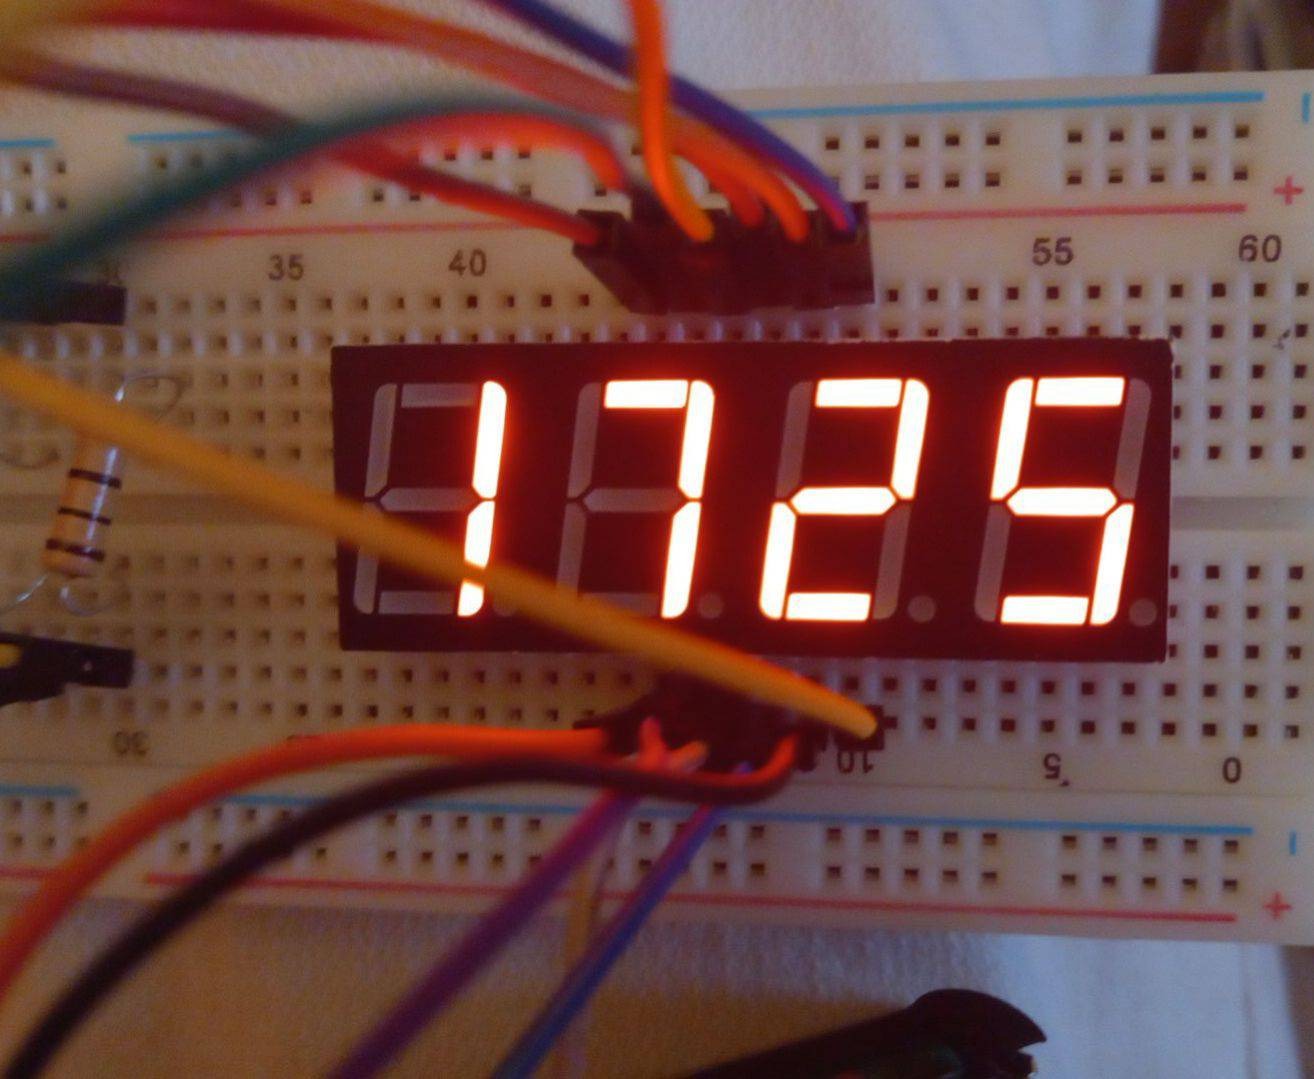
Following this, I saw that pin 5 was associated with the segment of interest. I checked my diagram and my circuit, and realised that I was one GPIO pin over. After moving it, I found that everything worked as it should!
Conclusions
Within an hour or so of trial and error with circuits I did not fully understand, I was able to build a working clock: a great beginner project for getting started in electronics. However, it was daunting at first, since I did not have a step-by-step tutorial of what to do given the components at my disposal. OpenAI Codex was able to help with the step I would have spent the most time on: writing the code. And having working code early in the project helped me debug the circuit quickly too.
What does this mean for software developers? I don’t want to speculate on the legal implications with copyright, etc, however my view on productivity is as follows: The three parts of software development for me are: 1) deciding what I want to do, 2) figuring out how to do it, and 3) debugging and integration. In its current state, tools like Codex really help with the 2nd step. Steps 1 and 3 I still had to do myself, although overall a lot of time was saved, since the 2nd stage would have taken me hours.
Does this mean that eventually steps 1 and 3 will be automated, and my skillset will become irrelevant? Perhaps, but I hope that deciding what to do will remain a human activity, and having a conception of how underlying systems work across the stack is essential to doing that.